DTH7000
with removable hard drive rack

CAUTION !!! Before doing anything, please read this warning :
IF YOU DECIDE TO DO THIS MODIFICATION, IT'S AT YOUR OWN RISK !
I
suppose that this kind of modification suppress the Thomson warranty.
I'm not sure to really discovered yet all the
potential consequences of such a modification, especially what is the
impact in term of power dissipation of the hard drive inside the rack
and the associated consequences on the lifespan of hard drive.
Update : To decrease a little bit the temperature
increasing however, I recently added an opened space on top of the disk
(see red comment "hole" on
image above).
I use to disconnect the disk from the unit after disconnecting it from AC line, and to switch it on again afterward but without any disk inserted into (to be able to play a DVD or listenning music). It works, but, again, I'm not able to guarantee it will always works and with no particular consequences !
You should also know some of the disadvantages :
The sound (noise) level is a little bit increased (one extra fan is inside the removable rack, and the DTH7000 cover is not fully closed)
The space used by the DTH7000 + removable rack is increased
In order to be able to read the DTH7000 hard disk
on my computer easily, or to use several specifically formatted disks
on the same DTH7000, I modified it to place the hard disk outside the
unit's case, inside a removable rack.
Due to short IDE cable length, the only solution without replacing this
IDE cable was to install the hard drive just below the case, after a
90° rotation.
I plugged a power extension cable, because the original one was too
short to go outside the case.
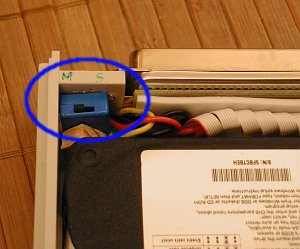
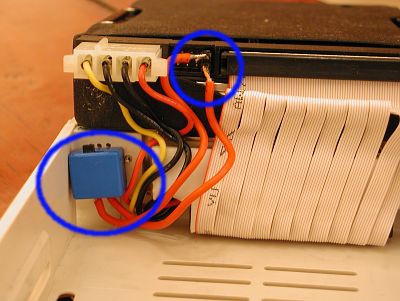
Inside the removable rack, I added a switch to be able to quickly
switch from master (inside the DTH7000) to slave mode (inside my PC).
The cover is almost
fully mounted, except one screw on the front left side which can't be
placed due to cables path.
I added some protection around the cables in the area of the cover edge
to be sure that the almost cutting edge won't cut cable after long uses.
To
be improved : Before extracting the hard drive, it is necessary to
switch the unit off, but there is no way to switch it off easily (no
switch on the front panel).
To solve this, I added a switch on the unit AC supply cable.
CAUTION
!!!
If you decide to do that, please choose a compatible switch built to
work on the AC line voltage (220VAC in France for example) and able to
handle the current of the unit.
To
fasten the jumper modification (from "master" in the unit, to "slave"
in the computer), I soldered 2 wires between both jumper's pins to a
dip switch.
This switch is placed close to the hard drive inside the rack and can
be easily and quickly manipulate when needed. The rack cover is never
used, therefore the temperature decreases a little bit and it gives
access to the switch.


To move the disk from the DTH7000 unit to the computer :
Switch off the computer and the unit.
Extract the disk from the unit
place the jumper at the rear side of the hard drive to the slave setting
insert the
rack into the computer (2 racks are needed : 1 below the unit to
receive the disk in normal mode, and another inside the computer case
to receive it on computer)
To move the disk back from the computer to the DTH7000 unit :
same as previously except that the jumper must be re-set to master setting